
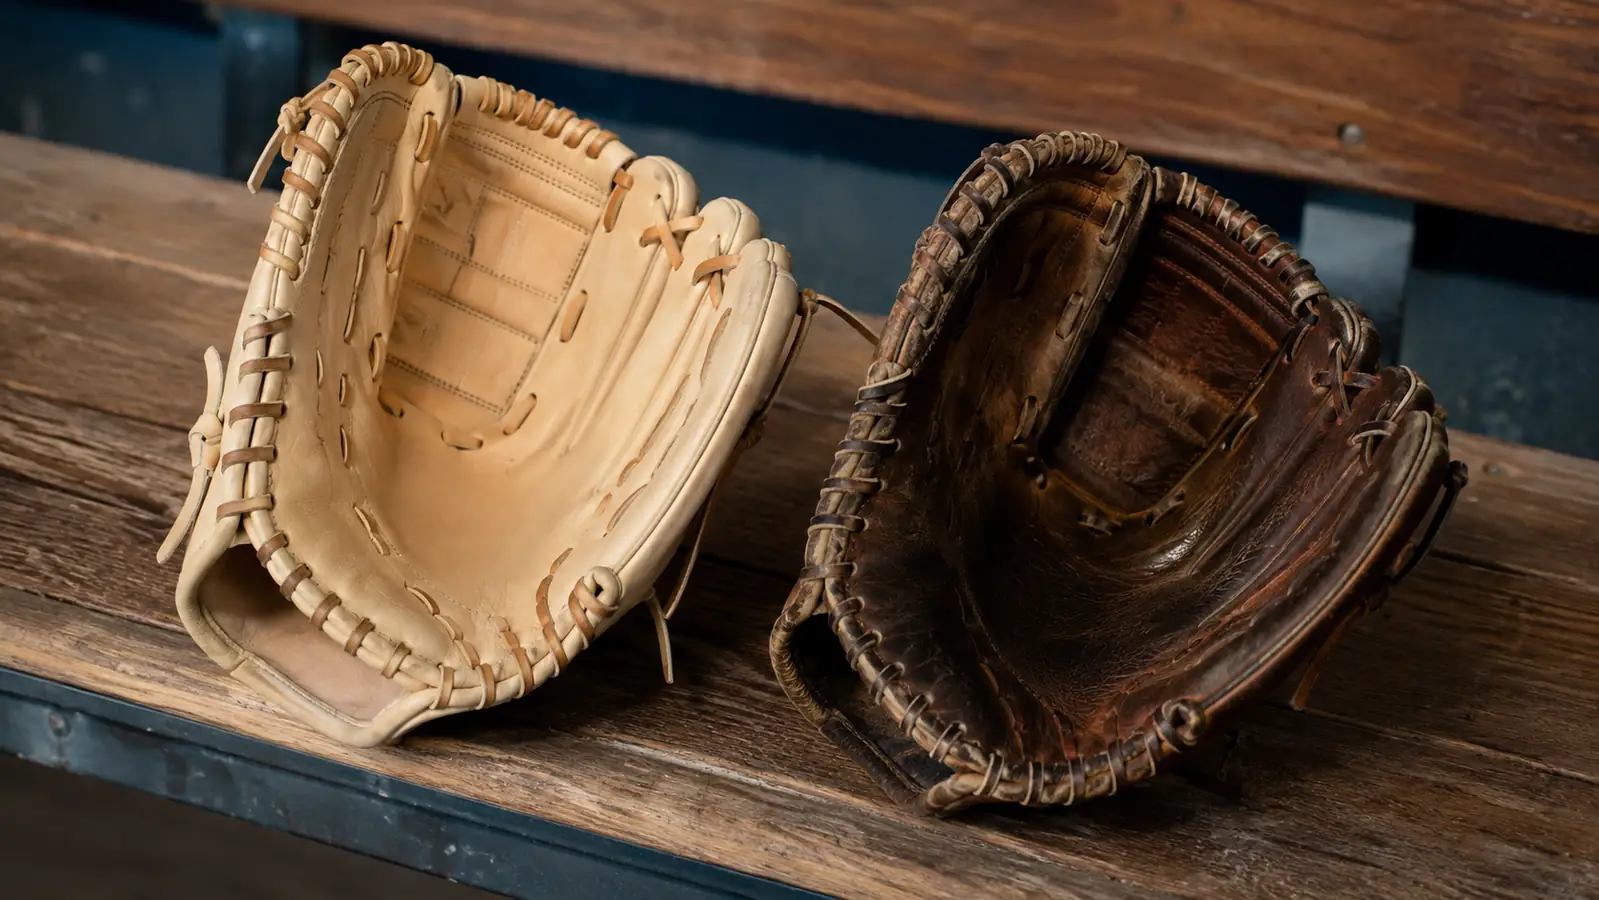
My son Cooper unboxed his Wilson A2000 the same week his fall ball team started practice, and for about six sessions, that glove and I were basically fighting each other. The web was stiff enough that it sprang back open the second a ball hit it. The pocket wouldn't cup around anything unless he physically pressed it there with his throwing hand. And by the second practice he had a blister on his palm the size of a dime, right where the heel of the leather kept biting into the same spot on every catch.
None of that is a defect. Pro Stock leather, which is what Wilson uses in the A2000, is dense and full-grain on purpose, because that's the same leather that holds its shape for years once it's actually broken in. The trade-off is that it arrives from the factory closer to a stiff piece of cowhide than a mitt. Skip the break-in and you'll fight the glove all season. Rush it with the wrong shortcuts, like soaking the whole thing in oil or clamping it shut and forgetting about it for a month, and you can permanently soften spots that are supposed to stay firm, like the heel and the web fingers. There's a right order to this, and it takes about two weeks of real, deliberate work, not two months of hoping.
One more thing before you start: where your kid plays changes how much you should soften. An infield glove like Cooper's 11.75 inch A2000 wants a shallower, tighter pocket for quick transfers, so you're not trying to make it as floppy as an outfielder's 12.75 inch model, which needs a deeper well to snag balls at full extension. Keep that target shape in mind through every step below, because it's easy to over-soften a middle infield glove until it can't hold anything tight enough for a quick exchange to second.
Starting from a stiff glove? Here's the one we used for this whole routine.
Everything below assumes a full-grain leather glove built to actually hold a pocket once you put in the work. The Wilson A2000 is the one we broke in for this guide.
Amazon Check Today's Price on Amazon →Step 1: Inspect the glove before you touch any product
Before a drop of conditioner goes anywhere near it, spend ten minutes just handling the glove. Open and close it slowly. Find the three or four spots where it actually wants to hinge, usually between the thumb and first finger and at the base of each finger channel. Those are the creases you're going to reinforce over the next two weeks, not fight against.
Check the lacing while you're at it. New gloves ship with laces at factory tension, and on the A2000 that's usually snug and even. If a lace already looks loose or twisted out of the box, tighten it now with a lacing tool rather than waiting until it's stretched further under game use. It's a lot easier to adjust a lace on day one than to re-lace a glove that's already shaped itself around a bad twist.
Factory stiffness also isn't uniform across the glove, so don't assume a stiff web means a stiff pocket or vice versa. Cooper's web was the tightest part of his glove out of the box, tighter than the finger stalls, which meant the web needed more attention in the early sessions while the fingers needed almost none. Spend that first inspection figuring out your glove's specific stiff spots instead of assuming they'll match some generic pattern.

Step 2: Warm the leather with your hands before any conditioner
This is the step almost everyone skips, and it's the one that matters most. Cold, stiff leather doesn't absorb conditioner evenly, it just sits on the surface. So for the first two or three days, before you apply anything, spend 10 to 15 minutes a session just working the glove with bare hands. Open and close the fingers repeatedly. Press your fist into the pocket and hold it there, then release. Fold the glove closed around your fist and squeeze the web.
Cooper did this in front of the TV most nights, which turned out to be the easiest way to actually get the reps in without it feeling like a chore. Fifteen minutes of mindless flexing while watching a game adds up fast, and by day three the glove was noticeably more willing to close on its own.
You'll know this stage is working when the glove stops springing back the second you let go. Early on, an A2000 will pop back toward flat almost instantly. By the end of two or three days of hand-flexing, it should hold a partial fold for a second or two before relaxing. That small change is the leather fibers actually loosening, not just the surface warming up.

Step 3: Condition sparingly, and only where the glove actually hinges
Once the leather is warmed up, apply a thin layer of glove conditioner, not the whole bottle, and not over the entire glove. Focus on the hinge points you found in step one: the web, the base of each finger, and the pocket. A dime-sized amount worked in with your fingers is plenty per session. The heel of the glove and the back of the hand don't need conditioning at all right now, those areas are supposed to stay firmer for structure.
Let it sit for a few minutes so the leather actually absorbs it, then work the glove by hand again the same way you did in step two. Repeat this every other day for about a week. You're looking for the leather to go from stiff-and-shiny to matte and slightly darker where you've been working it. If it starts looking greasy or the leather feels slick rather than supple, you've used too much and it's time to back off for a day or two.
Stick with a conditioner formulated for baseball leather rather than a general shoe or furniture leather product. The ones made for gloves are thinner and soak in faster without leaving a heavy film, which matters a lot on a full-grain leather like Pro Stock that's already dense. A thick, waxy conditioner will just sit on top and make the surface slick instead of supple.

Step 4: Build the pocket with a real catch progression
This is where a lot of routines go straight to a ball and rubber bands and call it done. We did something slower instead, because a hand-formed pocket ends up matching the player's actual catching motion instead of just an arbitrary dent. Start with soft, short-hop tosses against a garage wall or a net, catching one-handed and focusing on closing the glove around the ball in the exact same spot every single time.
Once that's consistent, move to soft toss from a parent or sibling at short distance, maybe 15 feet, and gradually work back to normal catch distance over four or five sessions. The point isn't reps for the sake of reps, it's catching the ball in one repeatable spot until the leather starts remembering it. Cooper did about 20 minutes a day of this for a week, mixed in with his normal practice, and you could visibly see the pocket deepen exactly where he was catching.
Between sessions, wrap a couple of thick rubber bands around the closed glove at the fingertips and the heel, not laced shut with anything jammed inside. This holds the shape you just built without cranking unnatural pressure into the web the way an overstuffed ball can. Do this work outdoors or in a garage at a normal temperature, too. Leather flexes differently in the cold, and pushing hard on a stiff glove in 40 degree weather is a good way to crack the grain instead of softening it.
Step 5: Lock in the shape overnight without overdoing the pressure
For the last part of the break-in, once the pocket has a real shape to protect, we used a bat barrel instead of a mallet. Set the fat end of a bat into the formed pocket, close the glove around it, and secure it with the same rubber bands from step four. This applies even, rounded pressure that matches the shape of an actual ball rather than the flat, repetitive pounding a mallet gives one exact spot.
Leave it like that overnight in a closet or bag, somewhere at normal room temperature. Do this for four or five nights over the second week, alternating with regular catch sessions during the day. By the end of it, the glove should close most of the way on its own weight, with just a light push needed to finish the pocket around the ball.
You'll know it's game ready when Cooper can one-hand a firm toss without the ball popping back out, and when the glove closes around a resting ball with the rubber bands off. If it still needs both hands to trap the ball, give it another few days of the catch progression before you trust it in a live game situation where you don't get a second attempt.
What Else Helps
A few habits keep the glove performing after the initial break-in instead of undoing it. Re-check the lacing every few weeks during the season, since game use stretches it faster than practice does, and a loosening web lace is the first sign a re-lace is coming. Condition lightly maybe once a month during a full season, not every week, since over-conditioning is what actually softens a glove past the point of holding a shape. And skip the microwave, oven, or dishwasher shortcuts you'll see mentioned online. Heat that intense can dry out or warp Pro Stock leather permanently, which turns a glove you put real work into back into a stiff paperweight.
Between seasons, store it closed around a ball with a light rubber band, in a cool dry spot rather than a bag zipped up in a hot garage or car trunk. Leather that sits crushed flat in a bag all winter tends to lose some of the shape you spent two weeks building, and you'll end up doing a shortened version of this whole routine again come spring just to get it back.
One last note if you're breaking in a glove mid-season rather than in the offseason: don't try to compress this into a single weekend before a tournament. A rushed break-in under game pressure is how you end up with a blister-covered hand and a pocket that never quite settles right, because you skipped the slow warm-up stage to get to live reps faster. If a tournament is close, start the routine the day the glove arrives, not the day before first pitch.
A hand-formed pocket matches how your kid actually catches. A mallet just matches where you hit it.
Two weeks of real work beats two months of hoping it softens on its own.
This whole routine works because the leather is worth breaking in properly. If you're starting from scratch, the Wilson A2000 is the glove we ran through every step above.
Amazon Check Today's Price on Amazon →